Multicolumn Pictures in Crystal Reports

Hello guys, its been a while since a posted something on this blog. I was working on this project where an item can have as many pictures as possible, as part of the requirement , a report was to be generated to show the item information and its pictures ( in a multicolumn way).

Below are the steps to show pictures in crystal reports (Note that the the data type used is image and hence using datasets as the data source for the reports, the picture can easily be dragged onto the report)

1. To start, the picture is dragged to the detail section of the report as shown in the picture below

image

2. Then right click on the “detail section” tab and choose the “section expert” as shown in the picture below

image

3. In the dialog box that appear, make sure the “details” section is selected and on the right hand side, on the “common” tab make sure “Format with Multiple columns “ is checked. The move to the “Layout” tab, make the required changes and make sure in the “printing direction” section you select “across” and down.

image

4. You are now done, with the reports, run you program and something as shown in the picture below should be shown.

image

2010 in review

The stats helper monkeys at WordPress.com mulled over how this blog did in 2010, and here’s a high level summary of its overall blog health:

Healthy blog!

The Blog-Health-o-Meter™ reads Wow.

Crunchy numbers

Featured image

The average container ship can carry about 4,500 containers. This blog was viewed about 23,000 times in 2010. If each view were a shipping container, your blog would have filled about 5 fully loaded ships.

In 2010, there were 6 new posts, growing the total archive of this blog to 37 posts. There were 22 pictures uploaded, taking up a total of 1mb. That’s about 2 pictures per month.

The busiest day of the year was November 11th with 149 views. The most popular post that day was CREATING JASPER REPORTS WITH DYNAMIC IMAGES.

Where did they come from?

The top referring sites in 2010 were jasperforge.org, en.wordpress.com, google.co.in, google.com, and stackoverflow.com.

Some visitors came searching, mostly for ireport dynamic image, netbeans mdi, objects in a jtable, +java +netbeans +mdi, and jasper report image.

Attractions in 2010

These are the posts and pages that got the most views in 2010.

1

CREATING JASPER REPORTS WITH DYNAMIC IMAGES July 2009
18 comments

2

Creating MDI Applications in Java Using Netbeans March 2009
11 comments

3

CHARTING WITH JASPER REPORTS August 2009
7 comments

4

Populating a JTable with a Collection (List) May 2009
11 comments

5

TABLEMODEL AS DATASOURCE IN JASPER REPORTS November 2009
13 comments

CREATING PARAMETERIZED REPORTS WITH REPORTING SERVICES

In our previous post (https://gilbertadjin.wordpress.com/2010/07/05/reporting-with-reporting-services/) we went through how to create  reports with reporting services. In instances where you want to insert some records onto the reports which are not part of the data source, for example, inserting dates into your report title, you need to create parameters. It is assumed you can create reports with reporting services.

In this post we will be adding two parameters “name” and “title” to our reports. After creating the report, in the report data pane (if not shown, go to the menu bar, click on “View” then “Report Data” to show the pane

image

Below is the look of the report data pane

image

In the Report Data pane, right click on the “parameters” node and click on add parameter. A dialog box shown below is presented. Enter the name of your parameter and choose the data type.

image

On the design you are done. Go to you where the report data will be supplied in your code. Make sure to import (“Imports Microsoft.Reporting.WinForms“)

For example we have a procedure which accepts parameters including a collection of parameters

   1: Public Sub fillReport(ByVal dataset As String, ByVal reportname As String, ByVal loadData As DataTable, ByVal parameters As ReportParameterCollection)

   2:        Me.ReportViewer1.ProcessingMode = ProcessingMode.Local

   3:        Me.ReportViewer1.LocalReport.ReportPath = Application.StartupPath + "/" + reportname + ".rdlc"

   4:        Me.ReportViewer1.LocalReport.DataSources.Add(New ReportDataSource(dataset, loadData))

   5:        Me.ReportViewer1.LocalReport.SetParameters(parameters)

   6:        Me.ReportViewer1.RefreshReport()

   7:    End Sub

we then give values to our parameters then we call our method above which will complete the job

   1: title = " Report on Sales made between " & Me.dtpStart.Value.ToShortDateString & " and " & Me.dtpEnd.Value.ToShortDateString

   2: Dim name As String = " Just trying"

   3: Dim parameters As New ReportParameterCollection()

   4: parameters.Add(New ReportParameter("title", title))

   5: parameters.Add(New ReportParameter("name", name))

   6: fillReport("DataSet1", "salesReports", Me.FarmershopeDataSet.SalesReports, parameters)

REPORTING WITH REPORTING SERVICES

Oh ok, so i don’t even need to worry downloading crystal reports for my Visual Studio 2010. Reporting services has been there for a while but did not bother to consider because I have been comfortable with crystal reports, but working on my first project with VS 2010 I had to, because was not seeing crystal reports and had to go through some processes to integrate. So i decided to give Reporting services a try and guys it is very cooooool. Are you a beginner in Reporting Services in Visual Studio, then this will offer you a great help.

Lets go through how to create a report using reporting services and dataset as the data source.

It is assumed you are working with a project with a dataset.

1. Right click to add a new item to your project. On the Reporting tab, choose “Report Wizard” and enter the name of your report in the “name” field provided at the bottom of the “add new item” dialog box. Click on the “Add’ button to proceed.

image

2. In this stage , you choose the data source of your report. You start by entering the name of your Dataset. Take note of the name you enter as you will use it in your code. Select the data source ( the dataset of your project) and then select the table you want to display in your report. Click next to go to the next stage.

image

3.Here, you choose the fields to display on your reports and how to group your records, either by rows or columns. Drag the fields you want to display in the “Values” area. In case you want group your records by rows or columns, drag that field to the “row groups” or “column groups “ respectively. Functions like sum,average, etc can be applied to  fields in the “values’ area. Click next to go the next tab

image 

4. In this stage you choose the layout of your report. Select your layout and click on the next button.

image

5. Select your report style and click on the finish button.

image


Your report is then displayed with the selected fields. You can then drag the table to a position of your choice on the report form. You can also insert text and image onto your report as it is done in crystal report.

image

After creating the reports you then have to integrate it into your forms. First you need to add a report viewer. You do this by creating a new form and dragging the report viewer onto it as shown below.

image

After this, you write some small codes to view your report.  First you have to make sure the data table is filled programmatically. Let say at form load event we want to display the report. We start by declaring a procedure that can that accepts the dataset name, report name and the datasource.

   1: public void fillReport(String dataset, String reportname, DataTable loadData)

   2:        {

   3:            this.reportViewer1.ProcessingMode = ProcessingMode.Local;

   4:            //choosing the report source

   5:            this.reportViewer1.LocalReport.ReportPath = Application.StartupPath + "/" + reportname + ".rdlc";

   6:            //add the datasource to the report

   7:            this.reportViewer1.LocalReport.DataSources.Add(new ReportDataSource(dataset, loadData));

   8:            this.reportViewer1.RefreshReport();

   9:  

  10:        }

so on form load we fill the data table and call the method above to fill the show the report.

“fillReport("DataSet1", "purchaseSearch", this.dataSet1.land”

Note that the dataset name should be the same as shown in the created report.

Enjoy…

STORED PROCEDURE PROGRAMMING IN JAVA USING MYSQL

Some of the benefits of stored procedure programming are faster execution of sql statements and also preventing sql injection. So whenever the application logic of your application is data centric, it is better to use stored procedure.

To access mysql stored procedure in your java application, you first create the stored procedure in mysql. Below is a sample created stored procedure in mysql.

   1: DELIMITER $$

   2: DROP PROCEDURE IF EXISTS `test`.`cdinsert`$$

   3: CREATE DEFINER=`root`@`localhost` PROCEDURE `cdinsert`(cID varchar(15), tdate varchar(15),cdNo int)

   4: BEGIN

   5:  if exists(select ID from cddetail where cdID=cID) then

   6:   update cddetail set transdate=tdate,cdNum=cdNo where cdID=cID;

   7:  else

   8:   insert into cddetail(cdID,transdate,cdNum) values (cID,tdate,cNo);

   9:  end if;

  10: END$$

  11: DELIMITER ;

You then create your java application  to access the stored procedure as shown below

   1: import java.sql.*;

   2: public class storproc {

   3:  

   4:     Connection conn = null;

   5:     Statement stm = null;

   6:     static final String url = "jdbc:mysql://localhost/test";

   7:     static final String user = "root";

   8:     static final String pswd = "password";

   9:  

  10:     //connecting to the mysql database

  11:     public Connection getConnection() {

  12:         try {

  13:             conn = DriverManager.getConnection(url, user, pswd);

  14:         } catch (Exception ex) {

  15:             System.out.println("error occured " + ex.toString());

  16:         }

  17:         return conn;

  18:     }

  19:  

  20:     public void insertNew(String line) {

  21:         try {

  22:             String input[] = line.split(",");

  23:             //calling the created storedprocedure 

  24:             //and passing the required parameters

  25:             CallableStatement cs = this.getConnection().

  26:             prepareCall("{call insertnew(?,?,?)}");

  27:             

  28:             cs.setString(1, input[0]);

  29:             cs.setString(2, input[1]);

  30:             cs.setInt(3, Integer.parseInt(input[2]));

  31:             cs.execute();

  32:         } catch (Exception e) {

  33:             System.out.println("errr  " + e.toString());

  34:         } finally {

  35:             try {

  36:                 conn.close();

  37:             } catch (SQLException ex) {

  38:                 System.out.println("error occured " + ex.toString());

  39:             }

  40:         }

  41:  

  42:     }

  43: }

BIRTHDAY PROMPT PROGRAM DESIGN

Have been trying to write a simple SQL statement that can select a list of people from a table based on their birthdates. Thus if you are within some set days to your birthday you will be among the list selected.

I realized that, to get the query right, i had to test for some conditions, which means writing a function or a stored procedure.

I opted for the function and below are the queries written in both Microsoft SQL Server and MySql

This is the design, to check if  someone’s birthday let say 31-12-1990 is within a set range say 7 ( thus it is seven or less days to his or her birthday), these are the steps taken

1. We bring the birth date year to the current year, so we get 31-12-2010.

2. We then compare if the current birth date is greater than the current date

3. If it is greater we find the difference  in days between the two dates (birthdate-currentdate) and find out if the difference is between the set range

4. If current date is greater than birth date ( which means the guys birthdate is in the next year) we change the birth date year to the next year and find the difference as done in step 3. For example if the guy’s birthday is 2nd Jan and the current date is 30 Dec and the set days is 7, the guy should be in the list selected, so this condition takes care of this.

Below are the sql queries enjoy.

IN MSSQL

   1: CREATE FUNCTION dbo.getDaysPrompt (@bdate datetime, @curDate datetime)

   2: RETURNS int AS  

   3: BEGIN 

   4:  

   5: declare @mDate as datetime

   6: declare @days as int 

   7: select @mDate=dateadd(year,datediff(year,@bdate,@curDate),@bdate)

   8: if @curDate> @mdate

   9:  select @days=datediff(day,@curDate,dateadd(year,1,@mDate))

  10: else

  11:  select @days=datediff(day,@curDate,@mDate)

  12: return @days

  13:  

  14: END

IN MYSQL

   1: DELIMITER $$

   2: DROP FUNCTION IF EXISTS `dboffman`.`bdayPrompt`$$

   3: CREATE DEFINER=`root`@`localhost` FUNCTION `bdayPrompt`(bdate date,cDate date) RETURNS int(11)

   4: BEGIN

   5:  declare mDate  date;

   6:  declare days  int default 0;

   7:  set mDate=makedate(year(cdate),dayofyear(bdate));

   8:  if cDate > mdate then

   9:  set days=datediff(date_add(mDate, interval 1 year),cDate);

  10:  else

  11:  set days=datediff(mDate,cDate);

  12:  end if;

  13:  return days;

  14:  END$$

  15: DELIMITER ;

With this function we can then write our sql query for example

Select * from students where bdaypromt(birthday, curDate)>=0 and bdaypromt(birthday, curDate)<=@setdays

Enjoy !!!!!!

CREATING SIMPLE HELP FILES IN JAVA

In this post, we are to discuss how to create help for your swing application using swing components. The idea is to create text file for each help file, the content can be formatted with html, then on click of a button you display a particular file in a panel. To make the panel (help page) stay on top of other opened windows of your application we can choose to display it as a dialog.check https://gilbertadjin.wordpress.com/2009/10/21/form-showdialog-in-java/ how to show a panel as dialog.

To start with we create a class that will load a help file from a source(which you have save it in the settings of your application) by passing the file name without the extension….below is the class

   1: import java.io.File;

   2: import java.util.logging.Level;

   3: import java.util.logging.Logger;

   4: import javax.swing.JOptionPane;

   5: import org.apache.commons.io.FileUtils;//download org.apache.commons.io.FileUtils

   6: public class helpFile {

   7:     private String helpContent = null;

   8:     public helpFile(String filename) {

   9:        try {

  10:             //loading the help file from  a location stored in your settings

  11:             File file=new File(Settings.loadProperties().getProperty("xp.helpsource") +"/"+ filename +".txt");

  12:                         if (file.exists()) {

  13:                 helpContent = FileUtils.readFileToString(file);

  14:             } else {  

  15:                 JOptionPane.showMessageDialog(null, "File Does not Exist \n" + file.getPath() + "\n" + file.toString());

  16:             }

  17:         } catch (Exception ex) {

  18:             Logger.getLogger(helpFile.class.getName()).log(Level.SEVERE, null, ex);

  19:         }

  20:     }

  21:     @Override

  22:     public String toString() {

  23:         return helpContent;

  24:     }

  25: }

Then we create a panel and name it “helpdetailPanel”. We then add a JEditorPane to the Panel and then add the constructor below to the panel class

   1: public helpdetailpanel(String text) {

   2:         initComponents();

   3:         this.editor.setContentType("text/html");

   4:         this.editor.setText(text);    

   5:     }

Then in the application,on click of a button we add the code below to show a help based on the name (help file name) we pass to the “helpfile” class. Below shows the code to show the panel with the help content

   1: //helpfile is the class to load the help file from its source

   2:    helpdetailpanel hd = new helpdetailpanel(new helpFile("customers").toString());

   3:    hd.setSize(700, 700);

   4:    popupsjdialog d = new popupsjdialog(null, hd, true);

   5:    d.setVisible(true);

In the code above, “customers” is the name of a help file with a content below.

   1: <!DOCTYPE html PUBLIC "-//W3C//DTD HTML 4.01 Transitional//EN">

   2: <html>

   3: <head>

   4: " "

   5: </head>

   6: <body>

   7: <span style="" bold=""

   8:  text-decoration="" underline="">&nbsp;<span

   9:  style="font-weight: bold; text-decoration: underline;">CUSTOMER

  10: INFORMATION</span> </span>

  11: <br>

  12: <br>

  13: 1. To &nbsp;add a new Customer click on the add new button. Enter <br>

  14: &nbsp; &nbsp; &nbsp;the required information and click on

  15: Save<br>

  16: <br>

  17: 2. To Edit a Customer select it from the table view, make the changes

  18: required and click on Save<br>

  19: <br>

  20: 3. To delete a Customer, select it from the table view, and click on

  21: the delete button<br>

  22: </body>

  23: </html>

The picture below shows how the help content that is displayed at runtime on click of a help button in the Customers Panel.

image

Cheers  !!!!!!!!!!!

PROMPTING EXPIRY DATES OF PRODUCTS

In this post I’m writing about how to prompt users about the expiry dates of products without the use of any hardware (sensors). In this example, expiry dates are stored in the database and the user is prompted (based on configurable settings) that a product has some set days to expiry.

A very big assumption is made here

  • 1. Products purchased first, are sold first
  • 2. Quantity of products bought in one purchase have the same expiry date. For example, if you are buying 30 cartons of milk, the expiry date of all the cartons are the same

Now, lets go on with the design. We are using three (3) tables for our design namely, products table, purchase table and purchasedetail table. Note that the columns of the tables are just for the purpose of the expiry dates implementation

1) Products Table

ProductID ProductName Unitprice UnitsInStock

2)Purchase Table

PurchaseID SupplierID DatePurchased EmployeeID

3) PurchaseDetails Table

PurchaseID ProductID QuantityBought UnitPrice ExpiryDate

What we will be doing here is, we record the expiry date of a products when making the purchase. thus one product can have as many expiry dates as possible in the purchase details table based on the purchases made.

Note:when products are purchased , the quantity bought is added to the unitsinstock in the products table. Also when sales are made the neccesary deductions are made.

To prompt for expiry dates the key columns we will be using are the “unitsinStock” column in “products” table and the “quantitybought” column in “purchasedetails” table.

First we write a query to select records from the purchase details table. we select products with expiry dates greater than today and within the range of today + the set number of days to remind user

Example “select * from purchasedetails where Expirydates > today() and expirydate<=enddate” (enddate=today + the set number of days to give prompt)

Form the list of record (s) selected, using a loop , we first compare the last purchase record’s(purchaseID is auto generated number, so the highest PurchaseID value) quantity bought with the quantity in stock of that product.

IF the quantity bought (purchases details) is greater than the units in stock (products) , prompt that the number of that product(using units in stock) is expiring. You can add the date the purchase was made, from which of suppliers and the employee that handled the transaction from the Purchases table to the prompt and you end.

ELSE IF the units in stock (product) is greater than quantity bought (purchases details), this time prompt with the quantity bought as the number of products expiring. Then subtract the quantity bought from the units in stock with the remainder becoming the units in stock. mathematically unitsinstock=unitsinstock-quantitybought. Then move the the next  purchase record from the list.The loop start again.

Note: another termination condition is you can loop until the unitinstock is less or equal to zero.

Note: you can build a string of the prompts in the loop and show it after the loop

Please let me have your comments……….

DEVELOPING YOUR TECHNICAL CAREER

Hi developers or do i say hi programmers….., anyway hi all. One thing we have to know is that its not all about writing codes, testing application or doing the technical stuff that will help us improve our career. A lot is needed alongside;knowing how to mingle with your team, marketing your products; why don’t you stop reading those technical books this holidays and try your hands on any of these books from the pragmatic bookshelf and I bet you will never regret it

Just ebay for these books.

1. practices-of-an-agile-developer-working-in-the-real-world-pragmatic-programmers.

2.the-passionate-programmer-creating-a-remarkable-career-in-software-development-pragmatic-life

3.agile-coaching

4.land-the-tech-job-you-love-pragmatic-life

5.The Pragmatic Programmer, From Journeyman To Master

Happy happy Xmas and prosperous new year. May the Lord Almighty help us to be wise, fair, and kind in all our affairs. Stay blessed

CRYSTAL REPORT USING DATABASE TABLES AS DATASOURCE

Crystal reports can be created in .Net applications with different data sources including using database tables, stored procedures, typed datasets and also without a data source.

In this article we are going through how to create a crystal report for the first time using database tables as the datasource.

1. You have to create your windows project in using VS 2005. After creating the project, right on then project name in the solution explorer, select “add” and then “add new” as shown below.

image

2. In the add new dialog box, select “crystal Report” and name it, and then click on the add button.

image

3. You will be presented with the “crystal report gallery” dialog, choose “using the report wizard” and click on ok

image 

4.In the choose data source dialog, go to the “ Create New Connection” node and then select the “OLE DB(ADO)” sub node.

image

4. You will then be required to provide the database connection information. Slect the “Microsoft OLE DB provider for SQL server” and click on the next button

image

5. Here you provide the database logon parameters

image

6. After successfully connecting to the database, you then select the table (s) you want to display its content on your report

image

6. After selecting the table(s) you select the actual columns you want to displayimage

7. After choosing the columns you will display, you can click on next to choose the columns for grouping and then for filtering, and then finally you choose the format to display your report.

image

8. After you have finished designing your report, you then drag a “crystal reports viewer” onto your form.

image

Then create a code under the form load event to show your report on for load

Private Sub Form1_Load(ByVal sender As System.Object, ByVal e As System.EventArgs) Handles MyBase.Load
        ‘create a new report document 
        ‘and load the report from its source
        ‘use Application.StartupPath to get the address of your report fro deployment issues
        Dim rpd As New ReportDocument
        rpd.Load("C:\Gilbert\Personal\Projects\BlogPosts\BlogPosts\tableDS.rpt")
        Me.CrystalReportViewer1.ReportSource = rpd
        SetDBLogonForReport(rpd)

    End Sub

    ‘for deployment issues make sure the database paramaters are encrypted
    ‘and saved in the mysettings class

Private Sub SetDBLogonForReport(ByVal myReportDocument As ReportDocument)
       Dim myConnectionInfo As ConnectionInfo = New   ConnectionInfo()
       myConnectionInfo.DatabaseName = "datalinkDB"
       myConnectionInfo.UserID = "sa"
       myConnectionInfo.Password = "qwerty"
       myConnectionInfo.ServerName = "localhost"
       myConnectionInfo.IntegratedSecurity = "false"
       Dim myTables As Tables = myReportDocument.Database.Tables
       For Each myTable As  CrystalDecisions.CrystalReports.Engine.Table In myTables
           Dim myTableLogonInfo As TableLogOnInfo = myTable.LogOnInfo
           myTableLogonInfo.ConnectionInfo = myConnectionInfo
           myTable.ApplyLogOnInfo(myTableLogonInfo)
       Next
   End Sub

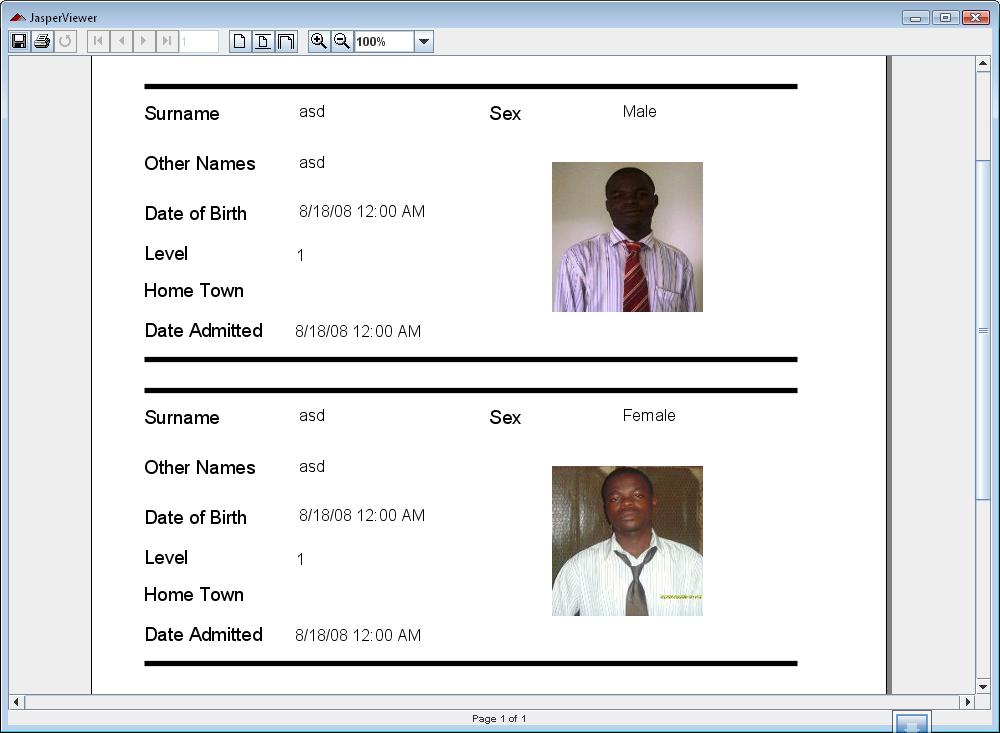
Below is a picture when the application is run

image